Creating a ticket in the new Client Portal
SECURITY All users who are assigned a standard security level
NAVIGATION Click New Ticket on the navigation bar
To create a new ticket in the Client Portal A branded web portal through which you and your service providers can collaborate on tickets and projects., do the following:
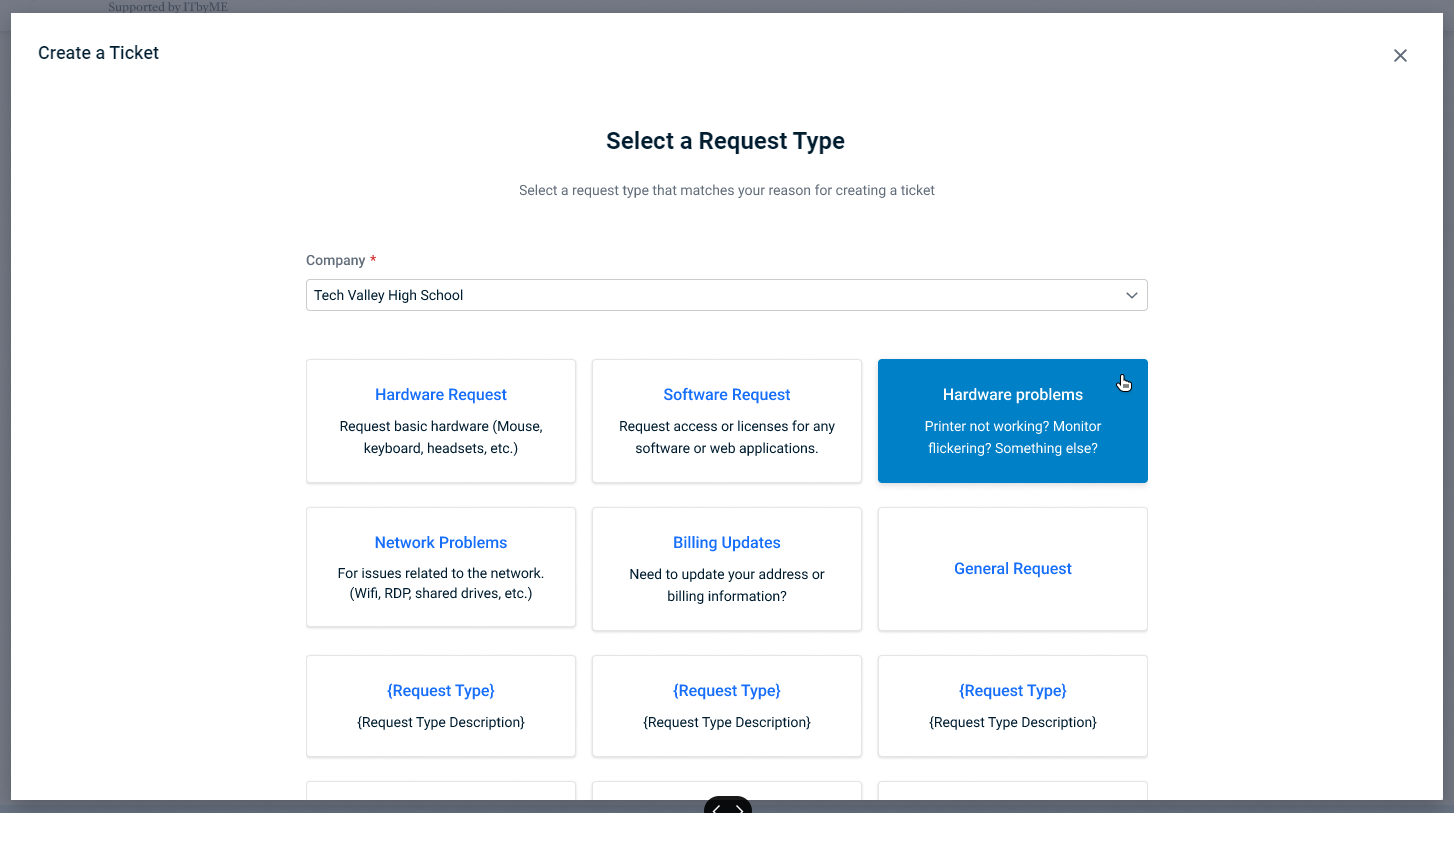
- Click New Ticket The Autotask entity that tracks service requests, incidents or problems that were added to Autotask by your customers, internal employees, or remote monitoring software. on the navigation bar. The Create a Ticket - Select a Request Type modal window will open.
- Select the request type that best matches your reason for creating the ticket. The Basic Information modal window will appear.
- Complete the following fields:
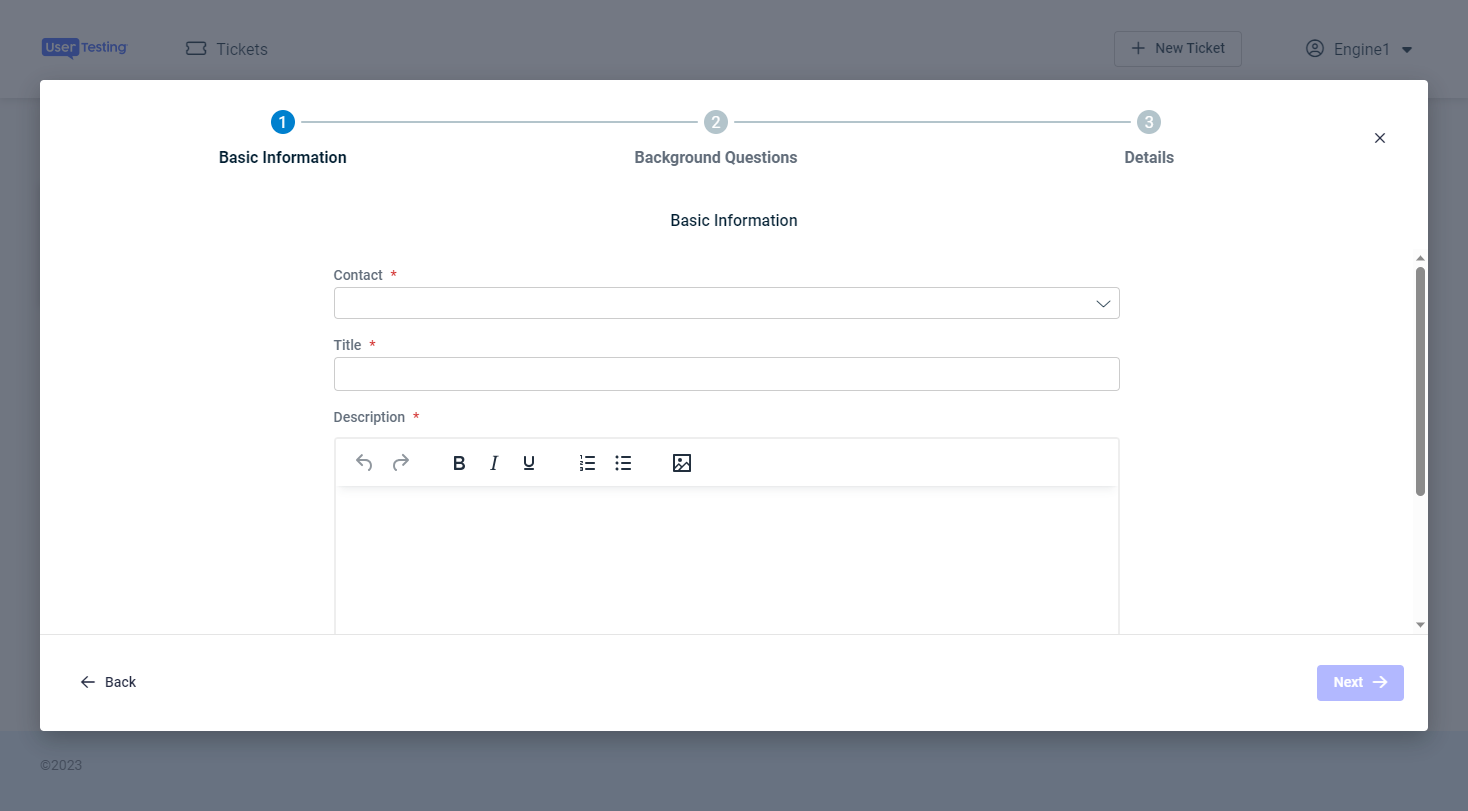
| Field | Description |
|---|---|
|
Defaults to the current user. To select another contact as the person the service provider will contact if they need additional information, click the dropdown arrow. This contact's email address and phone number will be displayed on the ticket. |
|
|
Title |
Enter a one-sentence summary of the issue tracked on the ticket. |
|
Description |
Type a description of the issue. Include as much detail as you can, including what the problem is, how to replicate the issue (if applicable), and any other important details. NOTE The Description field supports Rich Text. You can apply Bold, Italic and Underline styles, and add Numbered and Bullet lists, and upload and insert images. |
|
Who is impacted? |
These questions appear if the request type you selected on the previous page is configured to display them. They help us assess the urgency and priority of the ticket. Select the appropriate impact (Only Me | Others | My Entire Organization Your Autotask instance may be configured to use one of the following terms instead: Account, Business Unit, Client Company, Customer, Site.) and urgency (Low | Medium | High). |
|
How Urgent is your Request? |
- Click Next. If there are background questions configured for the request type you selected, they will appear on the next page. Responses can be up to 500 characters long.
Background questions are used to help us gather important information from you up front, so we can begin working on the issue as quickly as possible. Note A way of tracking additional information associated with an Autotask entity. that background questions may be required. - Click Next. The Details page will appear. The fields that appear on this page are configured for the request type you selected, and some may be required.
NOTE For field definitions, refer to Ticket Fields, but keep in mind that the ticket creation workflow is different than in the legacy portal..
- Click Create Ticket.
The ticket is saved with a status of New and appears on the ticket list and, unless you have Taskfire An extension of the Client Portal that lets you manage your own internal help desk. enabled and this is an internal ticket, in your service provider's Autotask instance.
The ticket is now submitted. For information on viewing and interacting with a ticket, refer to Viewing and working on a Ticket.